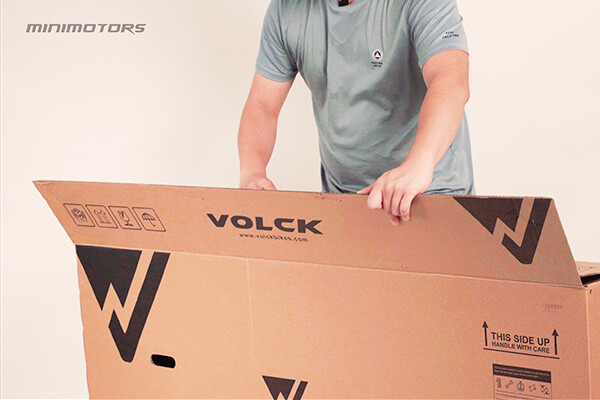
Prepare a knife or scissor to cut the packing straps and tape carefully.
Smart Tips: Check the box to ensure there is no damage in the delivery process. Before unboxing, please shoot a photo/video as evidence if you found any box damage.
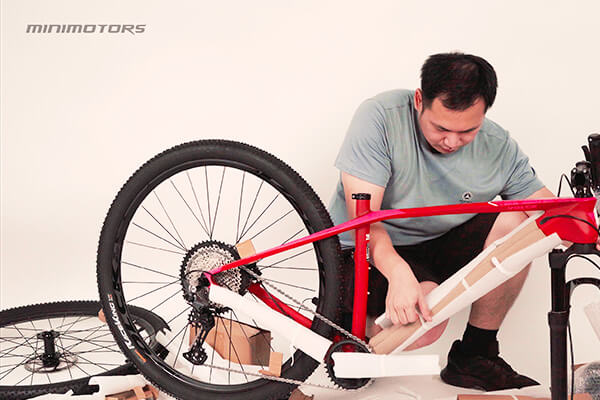
Step 2: Remove & Detach All Secured Parts
Bring out everything from the box, put it all on the floor. Check the items below you will see inside the box:-
A semi-install Bike
A front Tire
A mini box with parts (pedal x2 , reflectors)
A saddle with seatpost
Next, cut the cable ties and remove secure covers from the bike frame, handlebar, and front tire. Remember to clean the rubbish.
Smart Tips: Cut the cable ties carefully, to avoid sketching the carbon frame.
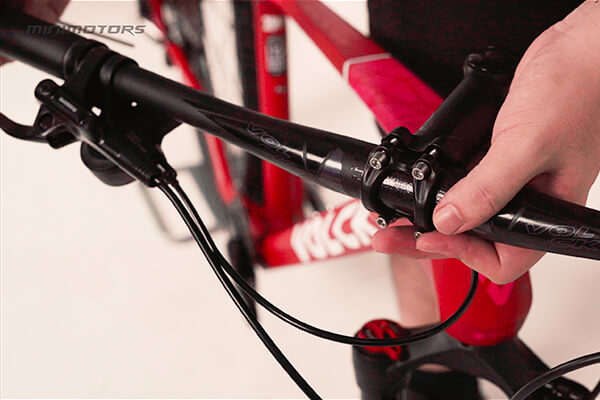
Step 3: Install Handlebar
Rotate the suspension fork where the fork brace is faceto the front.
Open the headset’s dust cap and loosen halfway of the headset’s(the 1 screw) and the stem’s steerer clamp(2 screws).
Rotate the stem, make sure the 4 screws are facing the front direction. (Double check the fork brace is facing the front direction also).Then, tighten back the 1 headset’s and 2 stem’s screw.
Remove the stem handlebar’s(the 4 screws) by using the allen key. (Size: 4.0)
Centralize your handlebar, rotate it to the marked area, adjust the angle of the handlebar and make sure it is suitable for you before you tighten it.
Smart Tips: If you have the tire installed first, you need to use your legs to hold the tire from losing balance to install your handlebar. So, we will recommend installing the handlebar first.
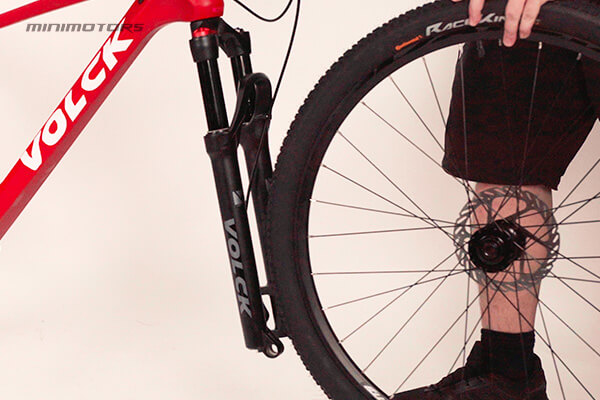
Step 4: Install Front Wheel
Remember to rotate the stem facing straight forward to avoid hitting the bike frame when installing the front wheel (not important, but useful)
Remove the red plastic protector on the brake caliper
Unscrew the nut and the axle on the bicycle fork by using the allen tool (size: 5.0)
Tighten back (nut and axle) with the front tire and carefully connect the bike disc (rotor) into the brake caliper
Smart Tips: Check your brake’s wires are not bound or tie together (it may cause your brake not to work).
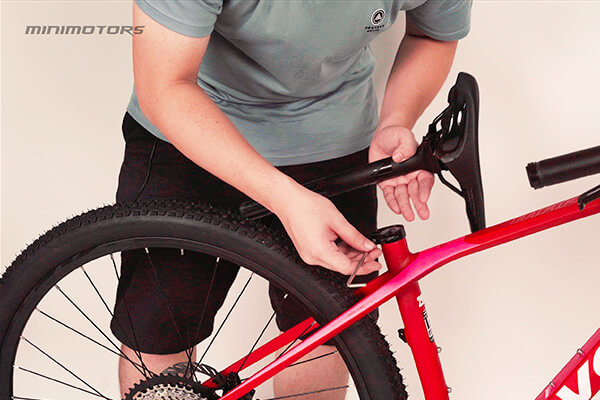
Step 5: Install Seat Post
Loosen the seat clamp’s screw carefully halfway
Install the seat post and adjust the saddle height that is suitable for you.
Tighten the seat clamp’s screw
Smart Tips: Be aware that the seat clamp’s screw and nut may be dropping, unscrewing the screw all the way is unnecessary.
Step 6: Install Pedals
Install the pedals in your crank arms using a wrench tool (size: 15)
A sticker label of L or R would be displayed on the pedals for you to install in the correct direction.
Smart Tips: Your right pedal is threaded regularly (clockwise to tighten), while your left pedal is reverse threaded (counter-clockwise to tighten).
Step 7: Checklist & Install Bike Accessories
Check handlebar, shifter/brake lever angle is suitable when you ride
Check the height of the seat is suitable for riding
Check gears to ensure smooth shifting
Check brakes are not rubbing with proper engagement
Check tire proper function with 85% to 90% filled air and no pear holes
Install the accessories you want
Smart Tips: Ride slowly when you check the situation of gear shifting and brake function.
Important notes: Volck bikes' left brake controls rear tire, and the right brake controls front tire.
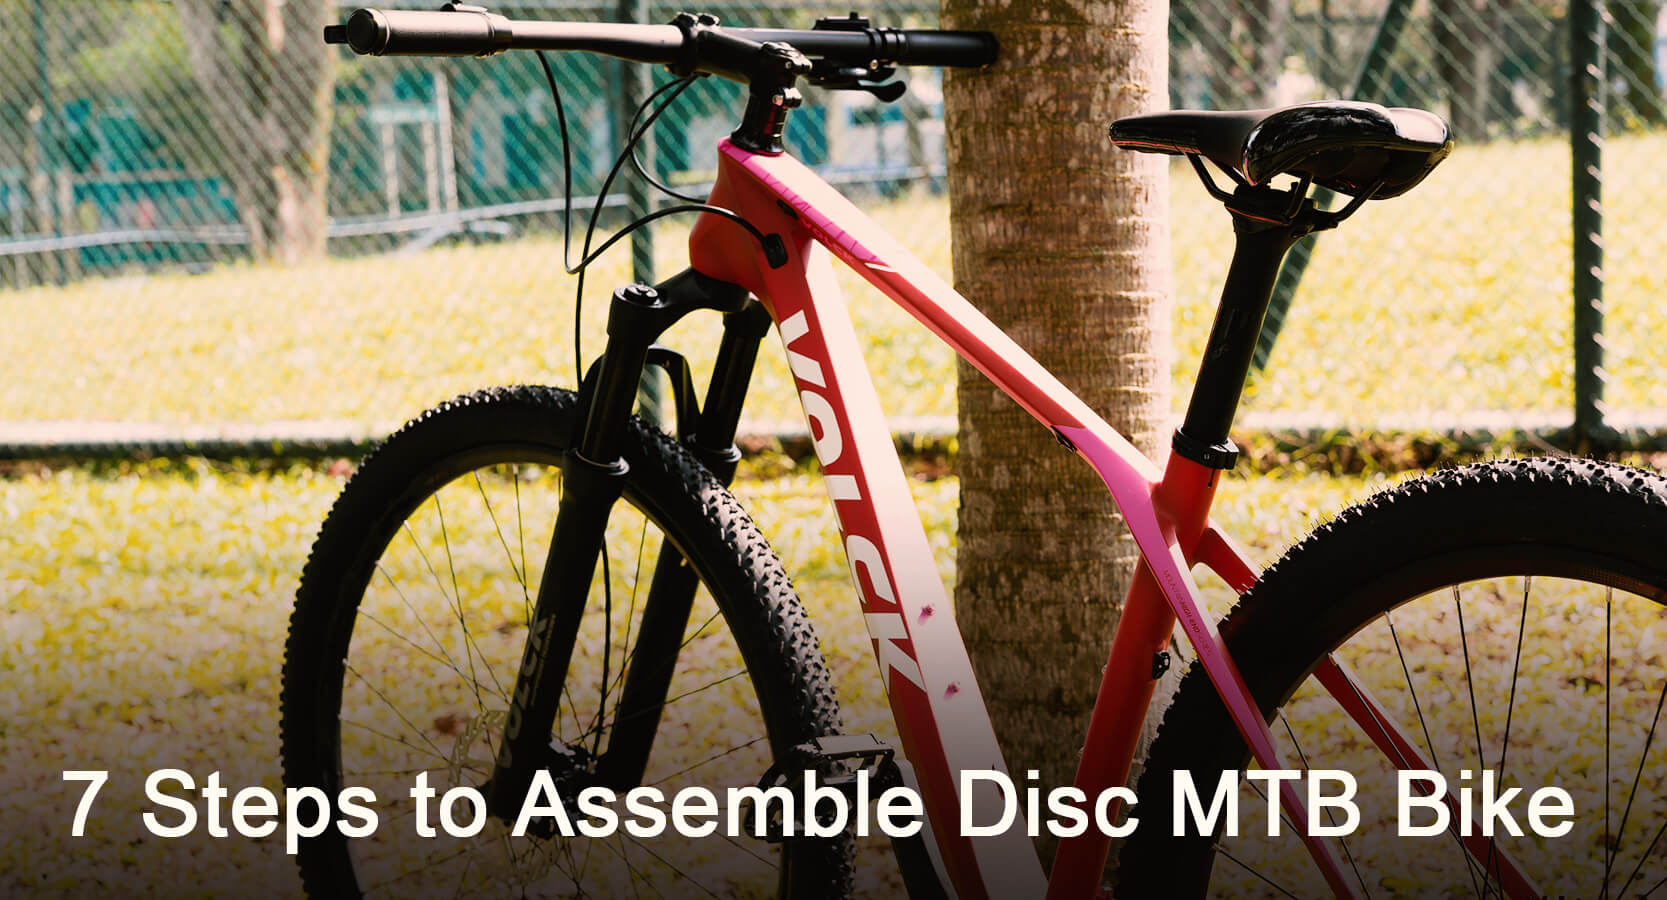
After a safety build and a tested ride, get out there for the RIDE!