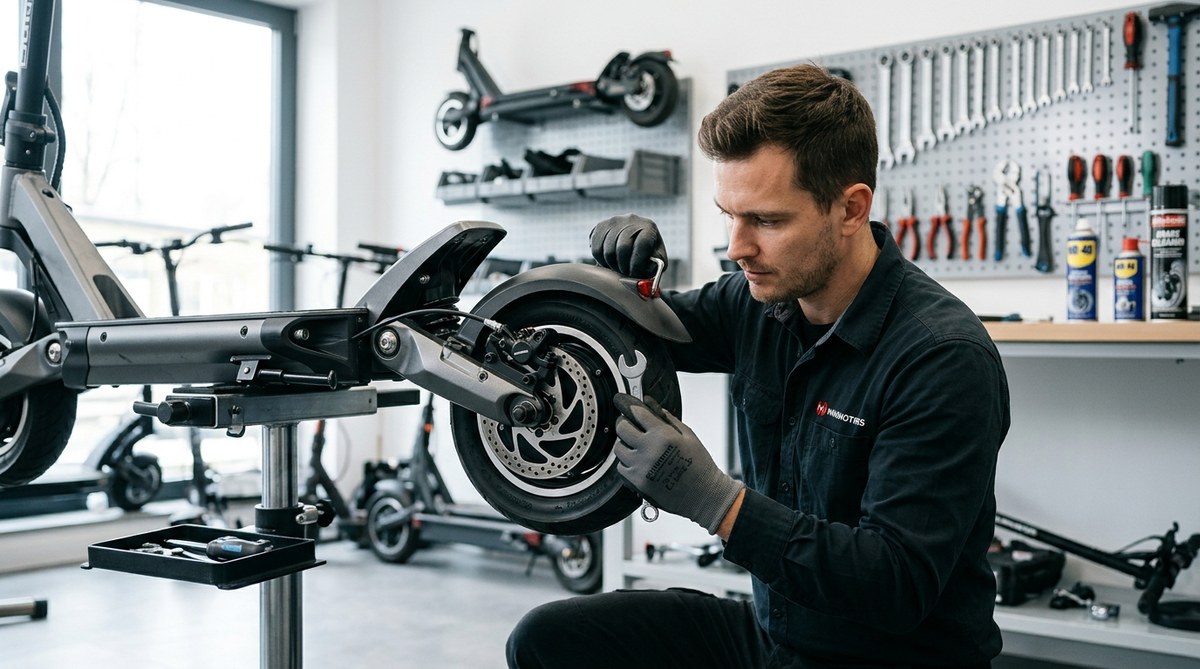
How to Diagnose and Fix Electric Scooter Brake Problems
Your electric scooter’s brakes are the single most important safety system on the ride. When they start to feel spongy, make noise, or lose stopping power, it is tempting to panic. But most brake problems are fixable with a few basic tools and a little patience. Whether you commute daily or ride for fun, knowing how to handle these issues yourself saves time and money. This guide walks you through the most common electric scooter brake problems and shows you exactly how to fix them.
Most electric scooter brake problems come down to three causes: cable stretch, pad wear, or rotor contamination. You can fix all three at home with a hex wrench set, a screwdriver, and about 30 minutes. This guide covers disc, drum, and electronic brakes so you can diagnose the issue, make the right adjustment, and ride safely again.
What Type of Brakes Does Your Scooter Have?
Before you start any repair, you need to know what system you are working with. Most modern electric scooters use one of three braking types. Each has its own symptoms and fixes.
- Disc brakes: A metal rotor spins with the wheel. Calipers squeeze pads against the rotor to slow you down. These are common on mid-range and premium scooters.
- Drum brakes: Brake shoes press outward against the inside of a drum. They are sealed and require less maintenance but can be harder to adjust.
- Electronic brakes: Regenerative or motor brakes use the motor to slow the wheel. They often work alongside a mechanical brake. Issues here are usually electrical, not mechanical.
If you are unsure which type you have, check your owner’s manual or look at the wheel hub. A visible metal disc means disc brakes. A sealed round housing means drum brakes. If there is no mechanical brake at the wheel, you likely have an electronic system.
Common Symptoms and Their Causes
Let us match the noise or feeling to the problem. Use this table to narrow down what is wrong with your scooter.
| Symptom | Likely Cause | Difficulty to Fix |
|---|---|---|
| Brake lever pulls to the handlebar | Worn pads or air in hydraulic line | Easy to moderate |
| Squealing or grinding sound | Contaminated pads or glazed rotor | Easy |
| Brake feels weak or spongy | Cable stretch or loose adjustment | Easy |
| Wheel drags or feels locked | Misaligned caliper or tight cable | Easy |
| Brake does not engage at all | Broken cable or snapped spring | Moderate |
| Electronic brake not working | Loose connector or controller issue | Moderate |
If you hear grinding, stop riding immediately. That sound means metal is rubbing on metal, which damages the rotor and pads.
Step-by-Step: How to Fix Disc Brake Problems
Disc brakes are the most common system on scooters in 2026. Here is how to fix the three most frequent issues.
1. Adjusting a Loose Brake Cable
A loose brake lever usually means the cable has stretched. This happens naturally over time.
- Locate the barrel adjuster where the cable meets the caliper or near the brake lever.
- Turn the adjuster counterclockwise to lengthen the barrel. This pulls more slack out of the cable.
- Test the brake lever. You want about 1 inch of travel before resistance starts.
- If the barrel adjuster runs out of thread, loosen the bolt at the caliper, pull the cable tighter, and retighten the bolt.
2. Replacing Worn Brake Pads
Brake pads wear down after 300 to 500 miles depending on riding style and conditions.
- Remove the wheel or the caliper mounting bolts to access the pads.
- Look for the retaining pin or clip that holds the pads in place.
- Slide the old pads out and push the new pads in. Make sure the friction material faces the rotor.
- Reinstall the retaining pin and remount the caliper.
- Spin the wheel to check for rubbing. Adjust the caliper position if needed.
3. Cleaning Contaminated Rotors and Pads
Oil, dirt, or spray lubricant can ruin your braking surface. If your brakes squeal or chatter, contamination is the likely culprit.
- Remove the wheel and take out the pads.
- Clean the rotor with isopropyl alcohol and a clean rag. Do not use WD-40 or any oil-based cleaner.
- Lightly sand the pad surface with fine grit sandpaper to remove the top layer of contamination.
- Reassemble and bed the brakes in by riding slowly and applying gentle pressure for the first 10 stops.
Expert tip: Never spray lubricant near your brake rotor. Even a small amount of chain lube or silicone spray can cause permanent squealing. If you must lubricate nearby parts, cover the rotor with a plastic bag first.
Fixing Drum Brake Issues
Drum brakes are less common but still found on many budget and commuter scooters. They are sealed, so contamination is rare. The main issue is cable stretch or worn shoes.
Adjusting Drum Brake Tension
- Find the adjustment nut on the brake arm near the wheel hub.
- Turn the nut clockwise to tighten. You should feel resistance after a quarter turn.
- Spin the wheel. If it drags, back the nut off slightly.
- Test the brake lever. It should feel firm but not stiff.
Drum brake shoes last longer than disc pads, typically 500 to 800 miles. When they do wear out, you need to open the drum housing. That job is harder and may be worth taking to a shop if you are not comfortable with internal springs.
Troubleshooting Electronic Brakes
Electronic brakes are great for range and low maintenance, but when they fail, the fix is different.
Check the Connection First
- Inspect the wire from the brake lever to the controller. Look for pinched or frayed wires.
- Unplug and replug the connector. Corrosion or a loose fit can stop the signal.
- Test the brake lever switch with a multimeter. It should show continuity when pressed.
- If the switch is dead, replace the brake lever assembly. These are usually cheap and easy to swap.
If the electronic brake still does not work after checking connections, the controller may have a fault. That is a more advanced repair. Consider contacting a service center or replacing the controller yourself if you have soldering experience.
When to Replace vs. Repair
Some brake problems are not worth fixing. Here is when you should replace parts instead of repairing them.
- Bent rotor: You can try to straighten a slightly bent rotor with an adjustable wrench, but a bent rotor often wobbles and causes pulsing. Replace it for safety.
- Cracked brake lever: Replace it. A cracked lever can snap under pressure.
- Hydraulic brake leak: If fluid is leaking from the caliper or line, the seal is broken. Rebuilding hydraulic brakes is tricky. A full replacement kit is often easier.
- Severely worn rotor: If the rotor has a deep groove or is below the minimum thickness stamped on the side, replace it.
For a deeper understanding of how each system works, check out our guide on understanding e-scooter braking systems. It covers disc, drum, and electronic brakes in detail.
Tools You Will Need
You do not need a full workshop. Most brake fixes require only these items.
- Hex wrench set (metric sizes 2mm to 6mm)
- Flathead and Phillips screwdrivers
- Isopropyl alcohol and clean rags
- Fine grit sandpaper (400 to 600 grit)
- Needle-nose pliers
- Replacement brake pads (check your scooter model)
Keep these in a small bag under your deck or in your backpack. A roadside adjustment can save your ride.
Mistakes That Make Things Worse
DIY repairs are great, but some common mistakes turn a small problem into a big one.
- Over-tightening the cable: This locks the wheel and wears pads faster. Always leave a little slack.
- Using the wrong tools: Stripped bolts are a nightmare. Use the correct hex size every time.
- Ignoring the break-in period: New pads and rotors need about 20 stops to bed in properly. Ride gently at first.
- Forgetting to check both brakes: Many scooters have a front and rear brake. Fix both even if only one feels bad.
For a full list of maintenance tasks to keep your scooter running, read our ultimate e-scooter maintenance checklist. It covers daily, weekly, and monthly checks.
Your Next Steps to Safe Braking
You now have a clear path to fix most electric scooter brake problems. Start with a simple visual inspection. Look for worn pads, loose cables, or dirty rotors. Make one adjustment at a time and test the brake before moving on. If something feels wrong after a repair, stop and double-check your work.
Brakes are not complicated. They are mechanical parts that wear and need attention. The more you work on them, the more confident you will become. And that confidence translates directly to safer riding.
Grab your hex wrenches, set aside 30 minutes this weekend, and give your scooter the brake service it deserves. Your future self will thank you when you stop smoothly at every intersection.
