Upgrade Your Ride: Performance Accessories That Actually Make a Difference
You’ve been riding your electric scooter for a few months now. The initial excitement has settled into routine, and you’re starting to wonder if there’s more power hiding under the deck. Maybe you’ve seen other riders zipping past with modified setups, or you’re just curious about what’s actually possible. The good news is that meaningful performance upgrades exist. The bad news is that most modifications promise more than they deliver.
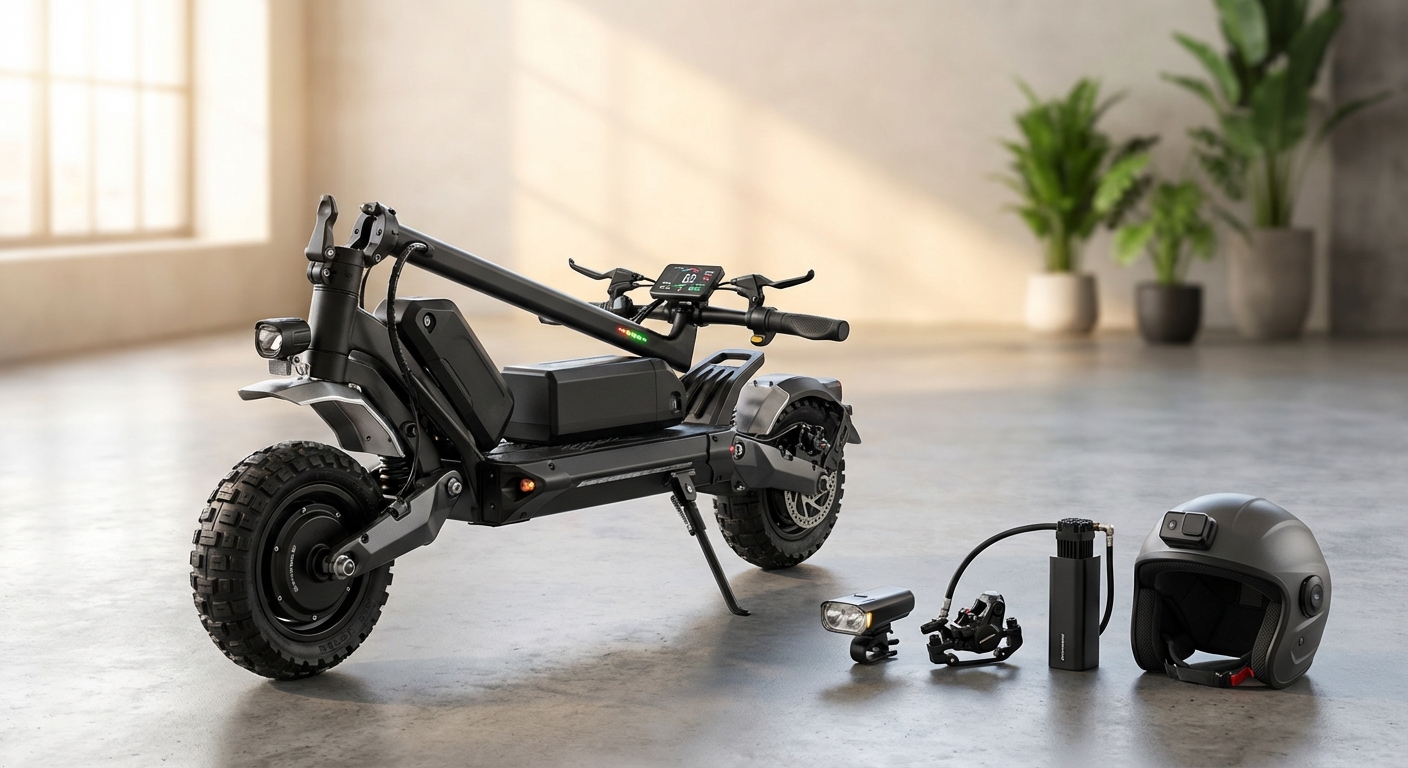
Not all e-scooter upgrades deliver real results. Battery capacity, tire quality, and suspension improvements provide measurable gains in range, handling, and comfort. Controller modifications and motor swaps offer power boosts but come with risks. Skip cosmetic changes and focus on components that directly affect your ride experience, safety, and daily usability for genuine performance improvements.
Battery upgrades that actually extend your range
Your battery determines how far you can ride before pushing your scooter home. It’s the single most impactful upgrade for daily riders.
Most stock batteries use older cell technology. Upgrading to a higher capacity battery with modern lithium cells can double your range. A 48V 13Ah battery might become a 48V 20Ah, adding 15 to 20 kilometers to your ride.
The catch is voltage compatibility. You can’t just slap any battery onto your scooter. Your controller needs to match the voltage, and your frame needs physical space for the larger pack.
Here’s what matters when choosing a battery upgrade:
- Cell quality (Samsung, LG, or Panasonic cells outlast generic brands)
- Actual capacity vs. advertised capacity (cheap batteries lie about their specs)
- Battery Management System (BMS) that protects against overcharging
- Physical dimensions that fit your deck compartment
- Connector compatibility with your existing wiring
Real world testing shows that quality matters more than raw capacity. A genuine 15Ah battery from a reputable manufacturer will outperform a sketchy 20Ah pack that overheats after 10 kilometers.
“I’ve tested dozens of battery upgrades, and the performance gap between quality cells and cheap alternatives is massive. A good battery maintains voltage under load. A bad one sags immediately, giving you less power when you need it most.” – Battery technician, Singapore e-scooter repair shop
Understanding how long e-scooter batteries actually last helps you make smarter upgrade choices based on realistic expectations rather than marketing claims.
Tire selection changes everything about handling
Tires affect acceleration, braking, cornering, and ride comfort. They’re also one of the easiest upgrades to install yourself.
Most budget scooters ship with hard rubber tires that prioritize durability over grip. Switching to pneumatic (air-filled) tires transforms how your scooter handles wet roads and uneven surfaces.
Pneumatic tires absorb bumps that would normally rattle through the frame. They grip better in rain. They corner with more confidence. The tradeoff is puncture risk and maintenance.
Solid honeycomb tires offer a middle ground. They provide some shock absorption without the puncture vulnerability of air-filled tires. They weigh more than pneumatics but less than solid rubber.
| Tire Type | Grip | Comfort | Puncture Risk | Maintenance |
|---|---|---|---|---|
| Solid rubber | Low | Low | None | None |
| Honeycomb | Medium | Medium | None | None |
| Pneumatic | High | High | High | Regular pressure checks |
| Tubeless pneumatic | High | High | Medium | Sealant top-ups |
Tire width matters too. Wider tires (10 inches instead of 8) increase contact patch and stability. They feel planted at higher speeds and handle potholes better.
Tread pattern affects wet weather performance. Slick tires hydroplane easily. Deep grooves channel water away from the contact patch, maintaining grip when roads are slick.
For daily commuting, pneumatic tires with moderate tread depth offer the best balance. Racing slicks belong on tracks, not city streets where conditions change constantly.
Suspension upgrades that save your spine
Stock suspension on most scooters is tuned for light riders on smooth roads. If you weigh more than 70kg or ride on rough pavement, you’re bottoming out constantly.
Upgrading springs or adding adjustable dampers lets you tune suspension to your weight and riding style. Stiffer springs prevent bottoming out. Adjustable dampers control how fast the suspension compresses and rebounds.
Front suspension handles most of the work during braking. Rear suspension smooths out acceleration bumps and maintains tire contact on rough surfaces.
Many riders focus on adding suspension where none exists. This requires frame modifications and engineering knowledge. It’s expensive and often creates more problems than it solves.
Better approach: upgrade existing suspension components. Replace weak springs with progressive rate springs that get stiffer as they compress. Add hydraulic dampers if your scooter only has springs.
Suspension travel matters. More travel absorbs bigger bumps but raises your center of gravity and affects handling. Most street scooters work best with 60 to 80mm of travel.
Controller and motor modifications for more power
Controllers regulate power delivery from battery to motor. Upgrading your controller can increase top speed and acceleration if your motor can handle it.
Most manufacturers limit controllers to protect motors from burning out. Removing these limits gives you more power but reduces motor lifespan. It’s a calculated risk.
Here’s the upgrade process for controller modifications:
- Identify your current controller’s amp rating and voltage
- Choose a higher amp controller that matches your battery voltage
- Verify your motor can handle the increased current
- Install the new controller and configure settings via app or display
- Test gradually, monitoring motor temperature during rides
Motor swaps deliver bigger performance gains but require mechanical skills. Replacing a 500W motor with a 1000W unit doubles your power output. Your scooter accelerates harder and climbs steeper hills.
The law complicates motor upgrades. Many jurisdictions limit e-scooter power to 500W or less. Installing a more powerful motor might make your scooter illegal for public roads.
Heat management becomes critical with power upgrades. More watts mean more heat. Motors without adequate cooling will fail. Some riders add heatsinks or cooling fans, but these modifications get complicated fast.
Performance gains from controller and motor upgrades:
- 30 to 50 percent faster acceleration
- 10 to 15 km/h higher top speed
- Better hill climbing ability
- Reduced range due to higher power consumption
- Increased wear on drivetrain components
Brake upgrades that actually stop you faster
More power demands better brakes. Stock brakes on budget scooters barely handle stock speeds. Add 10 km/h and stopping distances increase dangerously.
Hydraulic disc brakes outperform mechanical and electronic brakes in every scenario. They provide consistent stopping power regardless of weather. They require less hand force. They modulate better, letting you brake hard without locking up.
Upgrading from mechanical disc brakes to hydraulics involves replacing brake levers, calipers, and running hydraulic lines. It’s not complicated, but it requires basic mechanical skills and proper bleeding technique.
Larger rotors increase braking power. A 140mm rotor generates more leverage than a 120mm rotor. The caliper mounting points on your fork or frame limit rotor size, so check compatibility before buying.
Brake pad compound affects performance and longevity. Organic pads grip well but wear faster. Sintered metal pads last longer but need higher temperatures to work effectively. For street riding, semi-metallic pads offer the best compromise.
Electronic regenerative braking sounds appealing but rarely provides enough stopping power alone. It’s useful for gentle speed reduction and recovering small amounts of energy. Pair it with mechanical brakes for actual safety.
Smart accessories that improve the riding experience
Some upgrades don’t boost speed or range but make riding more practical and enjoyable.
Better lighting transforms night riding from sketchy to safe. Stock lights are usually dim and poorly positioned. Aftermarket LED bars provide 1000+ lumens, illuminating the road ahead and making you visible to traffic.
Phone mounts let you navigate without stopping to check your phone. Choose mounts with secure clamps and shock dampening. Your phone will vibrate loose otherwise.
Rear view mirrors eliminate blind spots when changing lanes or merging. Small handlebar-mounted mirrors give you awareness without adding bulk.
Upgraded displays show real-time data: speed, battery percentage, trip distance, and power mode. Some connect via Bluetooth, letting you customize settings through an app.
Fenders keep road spray off your clothes during wet rides. Full coverage fenders work better than minimal ones. They add weight but save your pants from mud stripes.
Kickstand upgrades prevent your scooter from falling over on uneven ground. Adjustable kickstands adapt to different parking angles. Center stands distribute weight better than side stands.
Storage solutions matter for commuters. Deck bags attach under the stem, holding tools and rain gear. Handlebar bags keep small items accessible. Consider choosing the right backpack for e-scooter riding if you carry larger items daily.
Modifications that waste money and time
Not every upgrade delivers value. Some modifications look impressive but do nothing for actual performance.
Cosmetic changes like LED underglow, custom paint, and decorative decals add zero functional benefit. They’re fine if aesthetics matter to you, but they won’t make you faster or safer.
Throttle response tuning rarely works as advertised. Apps and dongles claim to improve acceleration by adjusting controller curves. Most riders can’t feel the difference in real world riding.
Aftermarket stems and handlebars promise better handling but often just change riding position. Unless your stock bars are damaged or genuinely uncomfortable, replacement bars won’t transform your scooter.
Generic performance chips and power boosters sold online are usually scams. Real controller modifications require proper hardware, not plug-and-play dongles that do nothing.
Suspension spacers and preload adjusters sound technical but only work if your suspension has adjustment range built in. Adding spacers to non-adjustable suspension just makes it stiffer, not better.
Here are modifications that rarely justify their cost:
- Carbon fiber body panels (minimal weight savings for high cost)
- Aftermarket grips (unless stock grips are damaged)
- Custom foot decks (aesthetic change with no performance impact)
- Bluetooth speakers (adds weight, drains battery, distracts from traffic)
- Fake air intakes and vents (purely cosmetic)
What performance upgrades actually cost
Budget matters when planning modifications. Some upgrades deliver huge value per dollar. Others cost more than they’re worth.
Battery upgrades range from $200 to $800 depending on capacity and quality. This is expensive but justified if you need more range daily. The improved battery pays for itself by making longer commutes possible.
Tire replacements cost $30 to $100 per tire. Pneumatic tires need replacement every 1000 to 2000 kilometers depending on usage. Budget for this ongoing expense.
Suspension upgrades vary wildly. Simple spring replacements cost $50 to $150. Full hydraulic damper kits run $300 to $600. Installation adds labor costs if you can’t do it yourself.
Controller upgrades cost $100 to $300. Motor replacements range from $200 to $500 plus installation. These modifications often void warranties, adding hidden costs if something breaks.
Brake upgrades span $80 to $300 for complete hydraulic conversion. Individual components like rotors ($25 to $60) and pads ($15 to $40) need periodic replacement.
Smart accessories are cheaper: lights ($20 to $80), mirrors ($10 to $30), phone mounts ($15 to $50), displays ($50 to $150).
Calculate total upgrade costs before starting. Many riders spend more on modifications than their scooter originally cost. That’s fine if the upgrades deliver real value, but easy to regret if you chase marginal gains.
Installing upgrades safely without breaking things
Modifications void warranties. Accept this reality before opening your scooter.
Some upgrades require basic tools: hex keys, screwdrivers, wire strippers. Others need specialized equipment: torque wrenches, multimeters, hydraulic brake bleeders.
Watch installation videos specific to your scooter model before attempting modifications. Generic tutorials miss model-specific quirks that cause problems.
Take photos before disconnecting anything. You’ll reference these when reassembling components. Label wires with tape if your scooter has complex wiring.
Test modifications incrementally. Install one upgrade, test thoroughly, then move to the next. This isolates problems when something goes wrong.
Common installation mistakes to avoid:
- Over-tightening bolts and stripping threads
- Mixing up wire connections and shorting controllers
- Installing incompatible components without checking specs first
- Skipping safety checks after modifications
- Riding aggressively immediately after upgrades without break-in period
Some modifications require professional installation. Battery replacements involving soldering and BMS programming should be done by technicians unless you have electronics experience. Hydraulic brake installations need proper bleeding technique to avoid air bubbles that compromise braking.
If you’re just getting started with e-scooters, understanding essential things every first-time rider should know helps you prioritize which upgrades matter most for your riding style.
Legal considerations before modifying your scooter
Laws vary by location. What’s legal in one city might be banned in another.
Power limits restrict motor wattage and top speed in most jurisdictions. Exceeding these limits technically makes your scooter illegal for public roads. Enforcement varies, but the risk exists.
Some areas require registration for modified scooters above certain power thresholds. Check local regulations before installing performance upgrades that push your scooter into higher categories.
Insurance implications matter too. Modified scooters might not be covered under standard policies. Accidents on illegally modified scooters can create liability issues.
Noise regulations affect motor and controller modifications. Louder motors attract attention from enforcement. Keep modifications reasonably quiet to avoid problems.
Understanding how to register your electric scooter becomes important if your modifications change your scooter’s classification.
Measuring actual performance gains
Modifications should deliver measurable improvements. Test before and after to verify gains.
Range testing requires consistent conditions. Ride the same route at the same speed before and after battery upgrades. Track distance until battery depletion. Real range increases should be obvious.
Acceleration testing uses timed runs from standstill to target speed. Measure 0 to 25 km/h times before and after controller or motor upgrades. Improvements of 1 to 2 seconds indicate real gains.
Top speed measurements need safe, flat, straight roads with no traffic. Use GPS apps for accurate speed readings. Stock speedometers often read optimistically.
Braking distance tests measure stopping power. Mark a starting point, accelerate to test speed, brake hard, measure stopping distance. Shorter distances after brake upgrades confirm better performance.
Ride quality improvements are subjective but noticeable. Suspension and tire upgrades should reduce fatigue on rough roads. If you don’t feel the difference, the upgrade didn’t work.
Keep records of modifications and performance data. This helps you evaluate which upgrades delivered value and which disappointed.
Maintaining upgraded components for longevity
Performance parts need maintenance to keep working properly.
Upgraded batteries require proper charging habits. Never drain below 20 percent. Charge to 80 percent for daily use, 100 percent only for long rides. Store at 50 percent charge if not riding for weeks.
Pneumatic tires need pressure checks weekly. Under-inflated tires wear faster and handle poorly. Over-inflated tires reduce grip and comfort. Follow manufacturer recommendations.
Hydraulic brakes need occasional bleeding to remove air bubbles. Brake pads wear faster with aggressive riding. Inspect monthly and replace when pad material gets thin.
Controller and motor upgrades generate more heat. Check for loose connections and damaged wiring monthly. Clean dust and debris from motor vents to maintain cooling.
Suspension components need periodic lubrication. Dry bushings and pivots wear quickly and make noise. Use appropriate grease for your suspension type.
Regular maintenance prevents small problems from becoming expensive failures. Budget time and money for upkeep when planning modifications.
Building your upgrade roadmap
Don’t modify everything at once. Prioritize upgrades based on your biggest pain points.
If range limits where you can ride, start with battery upgrades. If rough roads make every ride uncomfortable, focus on suspension and tires. If stopping distances feel unsafe, upgrade brakes first.
Create a modification plan:
- Identify your scooter’s biggest limitation
- Research compatible upgrades for your specific model
- Set a realistic budget including installation and maintenance
- Buy quality components from reputable sources
- Install and test one upgrade before moving to the next
- Document results and adjust plans based on actual performance
Some upgrades work better together. Battery and controller upgrades complement each other. Tire and suspension improvements both enhance ride quality. Plan combinations that deliver synergistic benefits.
Avoid modification creep where you keep adding parts without clear goals. Each upgrade should solve a specific problem or enable new capabilities.
Getting the most from your upgraded scooter
Modifications unlock potential, but riding technique matters just as much.
More power requires better throttle control. Smooth acceleration preserves battery and reduces wear. Aggressive riding burns through upgrades faster.
Better brakes enable later braking, but anticipation keeps you safer than hard stops. Use your improved stopping power as a safety margin, not an excuse for aggressive riding.
Increased range opens new routes. Plan trips that weren’t possible before. Commute farther. Explore new areas. Actually use the capability you paid for.
Improved handling makes corners more fun, but street riding isn’t racing. Ride within your skill level and traffic conditions. Upgraded components don’t make you invincible.
Understanding what the average range is on a single charge helps you set realistic expectations even after battery upgrades.
Making upgrades worth the investment
Performance modifications should enhance your actual riding experience, not just satisfy curiosity.
The best upgrades solve real problems you face regularly. If you constantly run out of battery, a capacity upgrade makes sense. If you never ride beyond 15 kilometers, spending $500 on a bigger battery wastes money.
Consider your scooter’s base quality before investing heavily in modifications. Upgrading a $300 budget scooter with $800 in parts rarely makes financial sense. Those funds could buy a better stock scooter with superior components throughout.
Some modifications increase resale value. Others make your scooter harder to sell. Quality batteries and hydraulic brakes appeal to buyers. Extreme modifications scare away most potential purchasers.
Track your total investment. Know when you’ve crossed the line from sensible upgrades to throwing money at marginal gains.
The most valuable upgrades are the ones you notice every single ride. Better tires that grip confidently in rain. A battery that eliminates range anxiety. Brakes that stop you safely every time. These modifications pay dividends daily through improved experience and peace of mind.
Start with one meaningful upgrade. Test it thoroughly. Let it prove its value before planning the next modification. Build your scooter’s performance gradually, learning what actually matters to your riding style along the way.